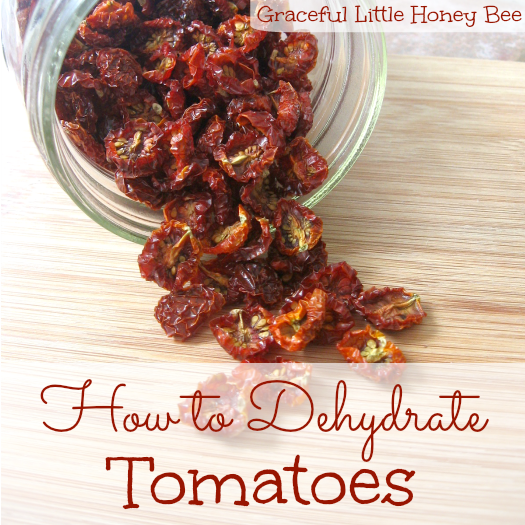
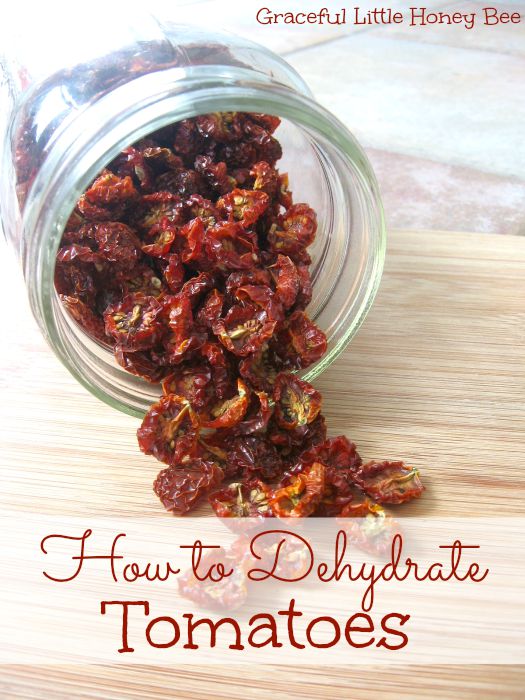
Our garden hasn’t been producing as much as I’d hoped this year, but it’s still giving us a small amount of fresh produce. This week we had too many tomatoes to eat, but not enough to can so what did I do? Dehydrate them!
Why dehydrate you ask? For starters, it’s easier, makes less of a mess and takes up less storage space than canning. Also, it keeps more nutrients intact because you aren’t actually cooking the food only removing the moisture.
Dehydrated tomatoes can be added to soups or stews such as chili or beef stew. Also, you can make a quick tomato sauce with them. This year I plan on grinding a lot of mine into a powder than can be used to make instant tomato sauce, juice or to flavor dishes such as chicken or eggs. I’ll definitely be posting a tutorial on that once I give it a try. So anyway, grab your tomatoes and let’s get started.
How to Dehydrate Tomatoes
You will need:
Tomatoes
Cutting Board
Knife
Dehydrator
Step 1: Wash and dry tomatoes. Discard any that are soft or overripe.
Step 2: Cut tomatoes into 1/4 inch thick slices. (Note: cherry tomatoes can be cut into halves or quarters.)
Step 3: Remove seeds and pulp. (You don’t have to do this, but it cuts down on the drying time.)
Step 4: Place tomatoes in a single layer on clean dehydrator trays. They should be close, but not overlapping.
Step 5: Set dehydrator on fruit and vegetable setting which should be between 135-145 degrees F.
Step 6: Run dehydrator until tomatoes are hard and crunchy. (Mine took about 22 hours, but I live in a humid climate.)
Step 7: Store dehydrated tomatoes in a clean, airtight container. (I use a mason jar.) Keep in a cool, dry place or in the freezer. If you see any condensation in your storage container then your tomatoes aren’t dried all the way, therefore will not store safely.
To rehydrate, cover with boiling water until soft.
Hi. Thanks for this... a few days late. I did my own thing with the dehydrator, but hubby is concerned about the cost of operating it. Today I placed the next picking in the shelves, but out in the sun, as it's really hot.
I placed the last lot in olive oil, but am interested to read your comment about just storing them in a covered jar... thanks.
Have you (or anyone following you) ever used the convection oven function to dehydrate foods? If so, how did it work in the end. I have a small, inexpensive dehydrator…but one of the commenters above, spouse remarks about energy costs associated with its long operation times.


4 Comments