DIY Farmhouse Style Rag Wreath Tutorial + Video
See how easy it is to make a DIY Farmhouse Style Rag Wreath in this quick and easy step-by-step tutorial!
This post contains affiliate links. If you make a purchase through one of these links, we will make a small commission at no extra cost to you. See our Disclosure Policy for more information.
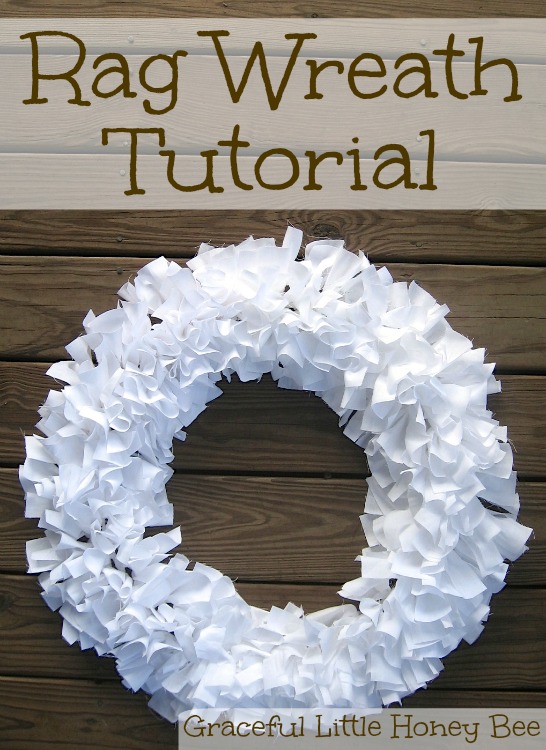
Farmhouse Style Rag Wreath
Handmade wreaths are an inexpensive way to change your decor up throughout the seasons and keep things looking fresh. They’re also a great way to add a personal touch to your home because no two are going to be the same.
I love this farmhouse rag wreath project because it’s simple and creates a beautiful and full shabby looking wreath. Plus, you can keep this project frugal by reusing old sheets or any fabric that you like.
Keep in mind that you want the fabric to be a medium weight so that the wreath holds it’s shape and doesn’t have a droopy look to it. I used regular quilting fabric. Feel free to change things up and use multiple fabrics or patterns if you would like.
My white rag wreath is currently hanging on the wall in my daughter’s room and the dark gray wreath that I’m making in the video below was a gift for my sister that she has hanging in her living room.
The possibilities are endless with these easy farmhouse style rag wreaths. I’ve seen people make them for St. Patrick’s day, Christmas, Valentine’s Easter, Sports Events, etc.
You’re definitely going to want to make one for yourself or to give as a gift. Enjoy the tutorial friends, and be sure to let me know what kind of wreath you are making in the comment section below. Happy Crafting!
Follow me on YouTube for more videos like this one!
Want more craft tutorials like this one? Here are a few of my favorites:
How to Make a Taggie Blanket
One Hour Burlap Kitchen Curtains
Granny Square Ear Warmers
Mason Jar Lid Ring Snowman Ornament
Follow Graceful Little Honey Bee on:
Pinterest | Facebook | Instagram | YouTube
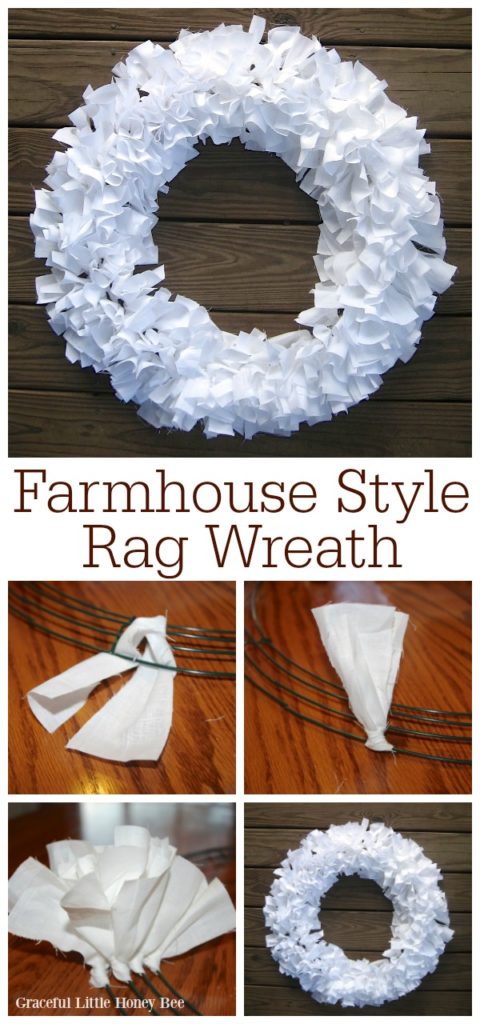
How to Make a Farmhouse Style Rag Wreath:
Supplies:
18″ wire wreath frame (you can choose any size that you prefer)
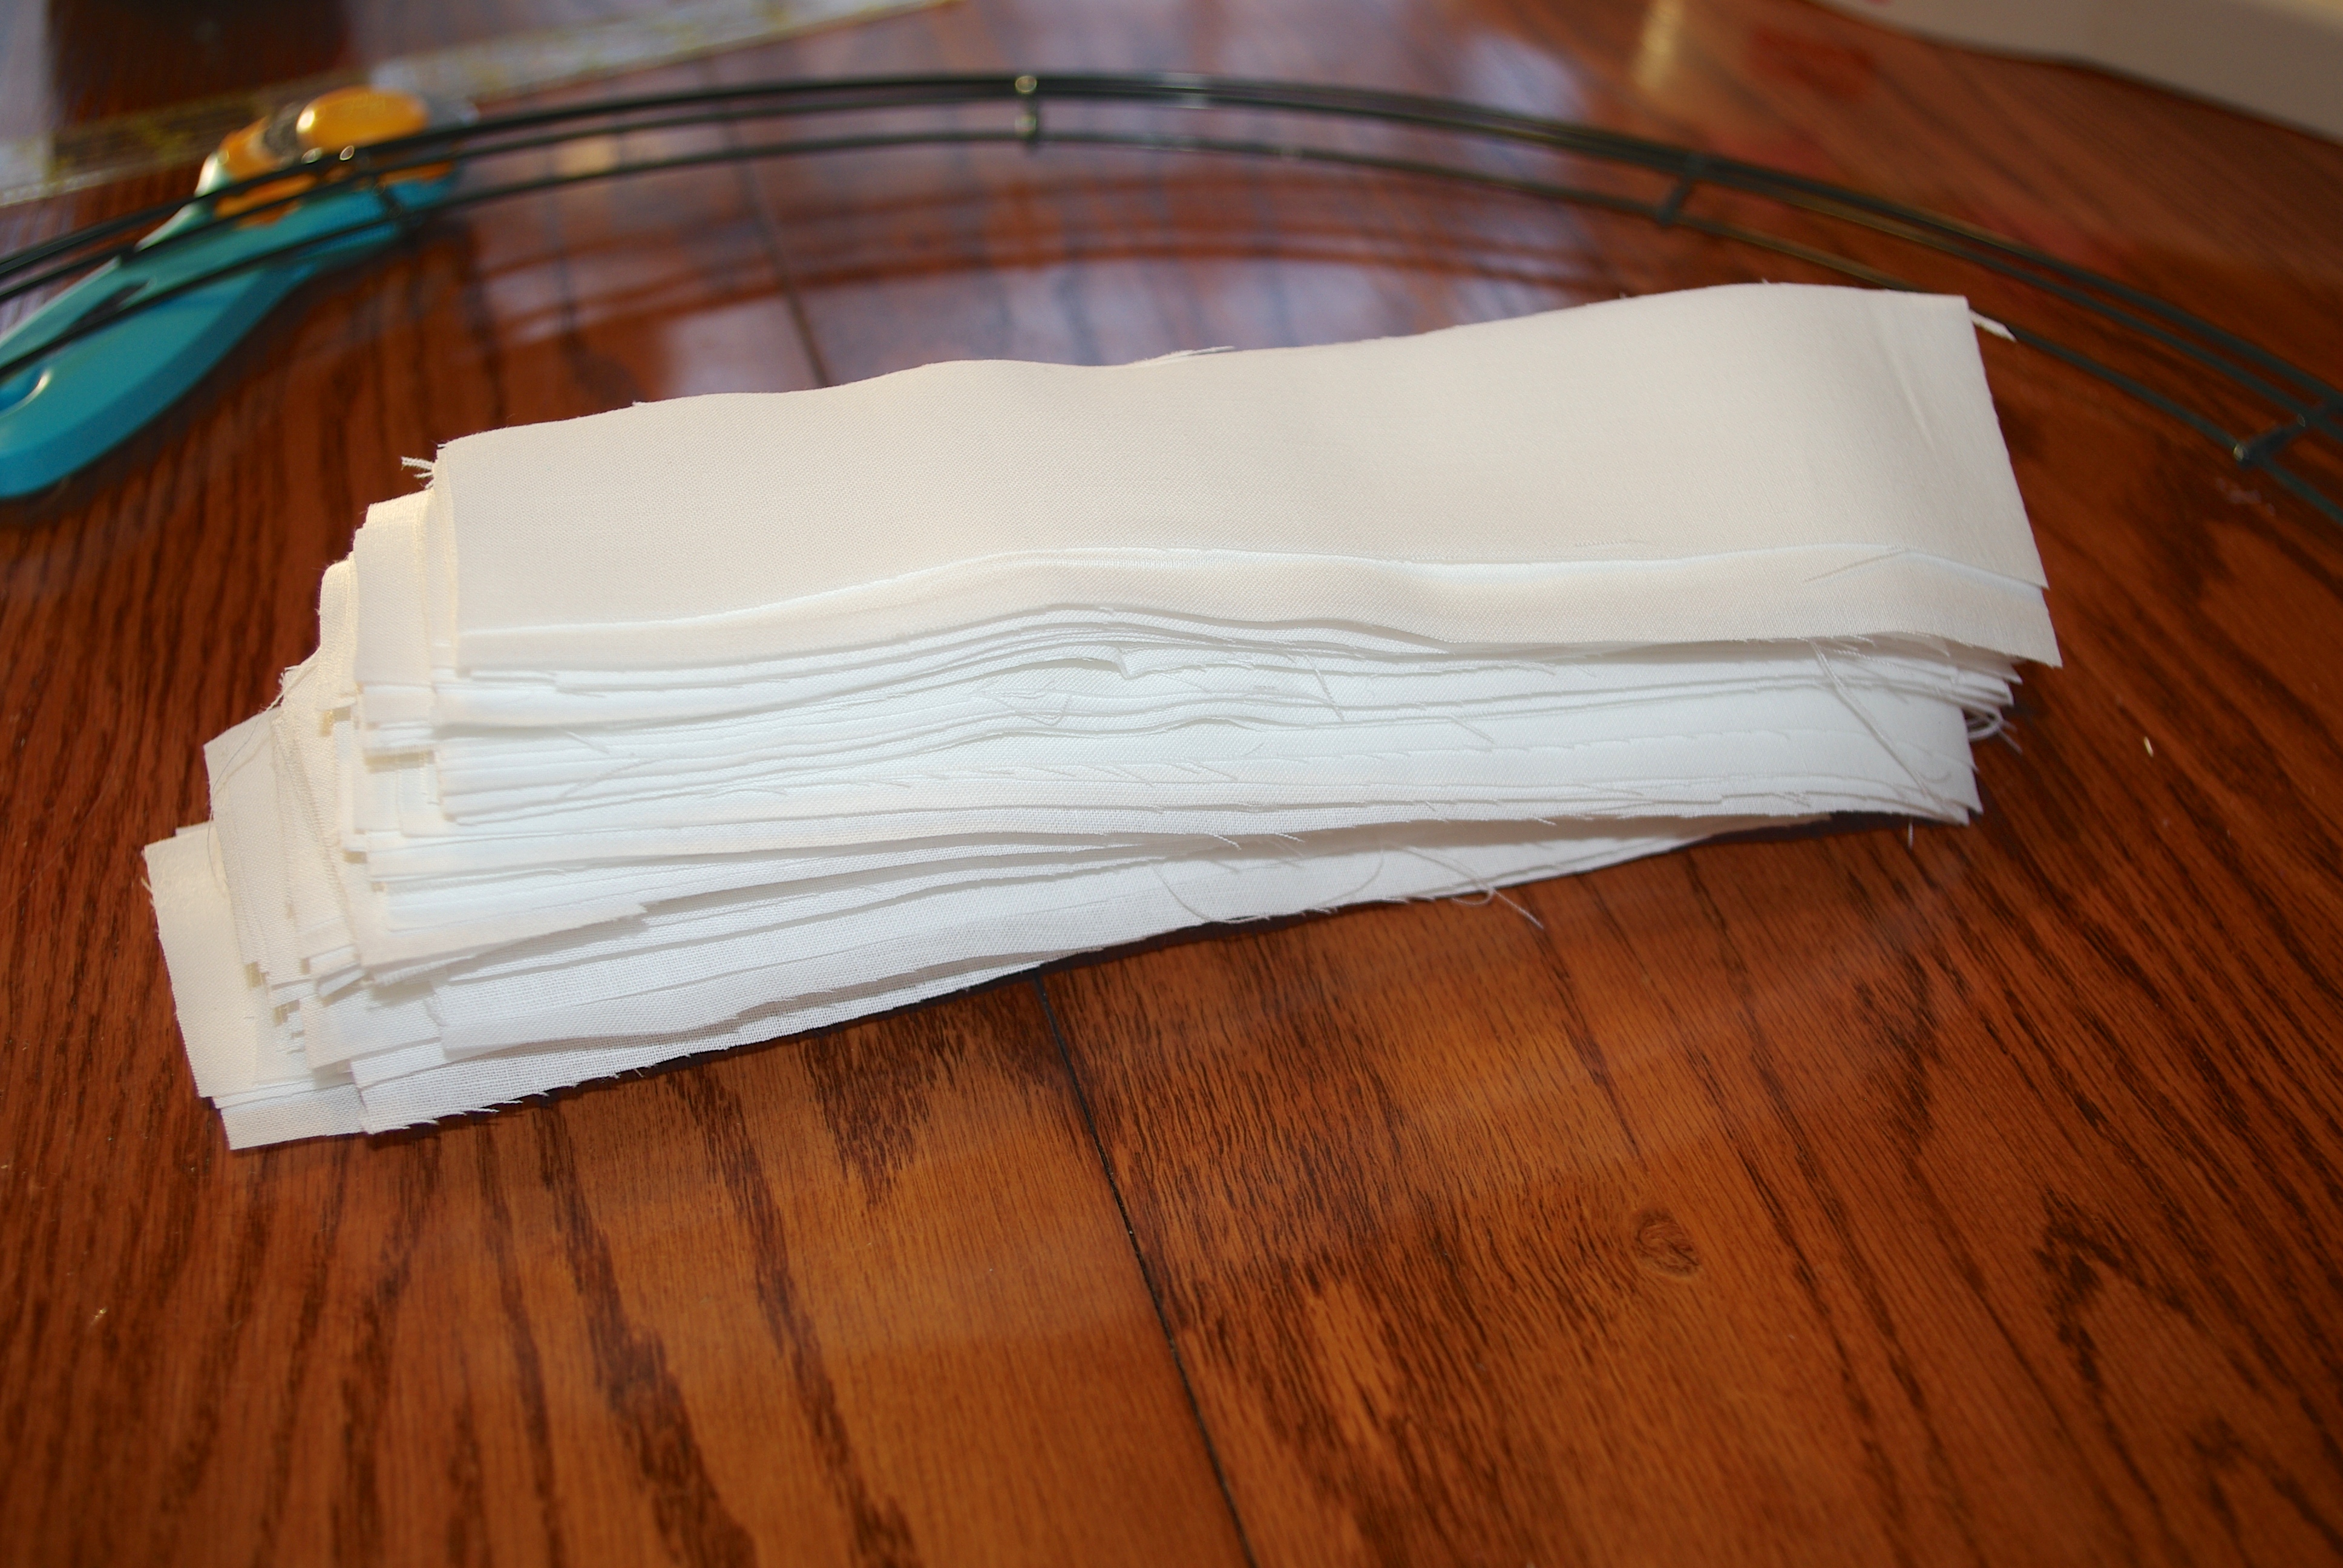
Cotton weight fabric
(I used 2-3 yds for a medium size frame, I don’t have exact measurements for each wreath size.)
Scissors (or Rotary Cutter and Rotary Mat)
Ruler
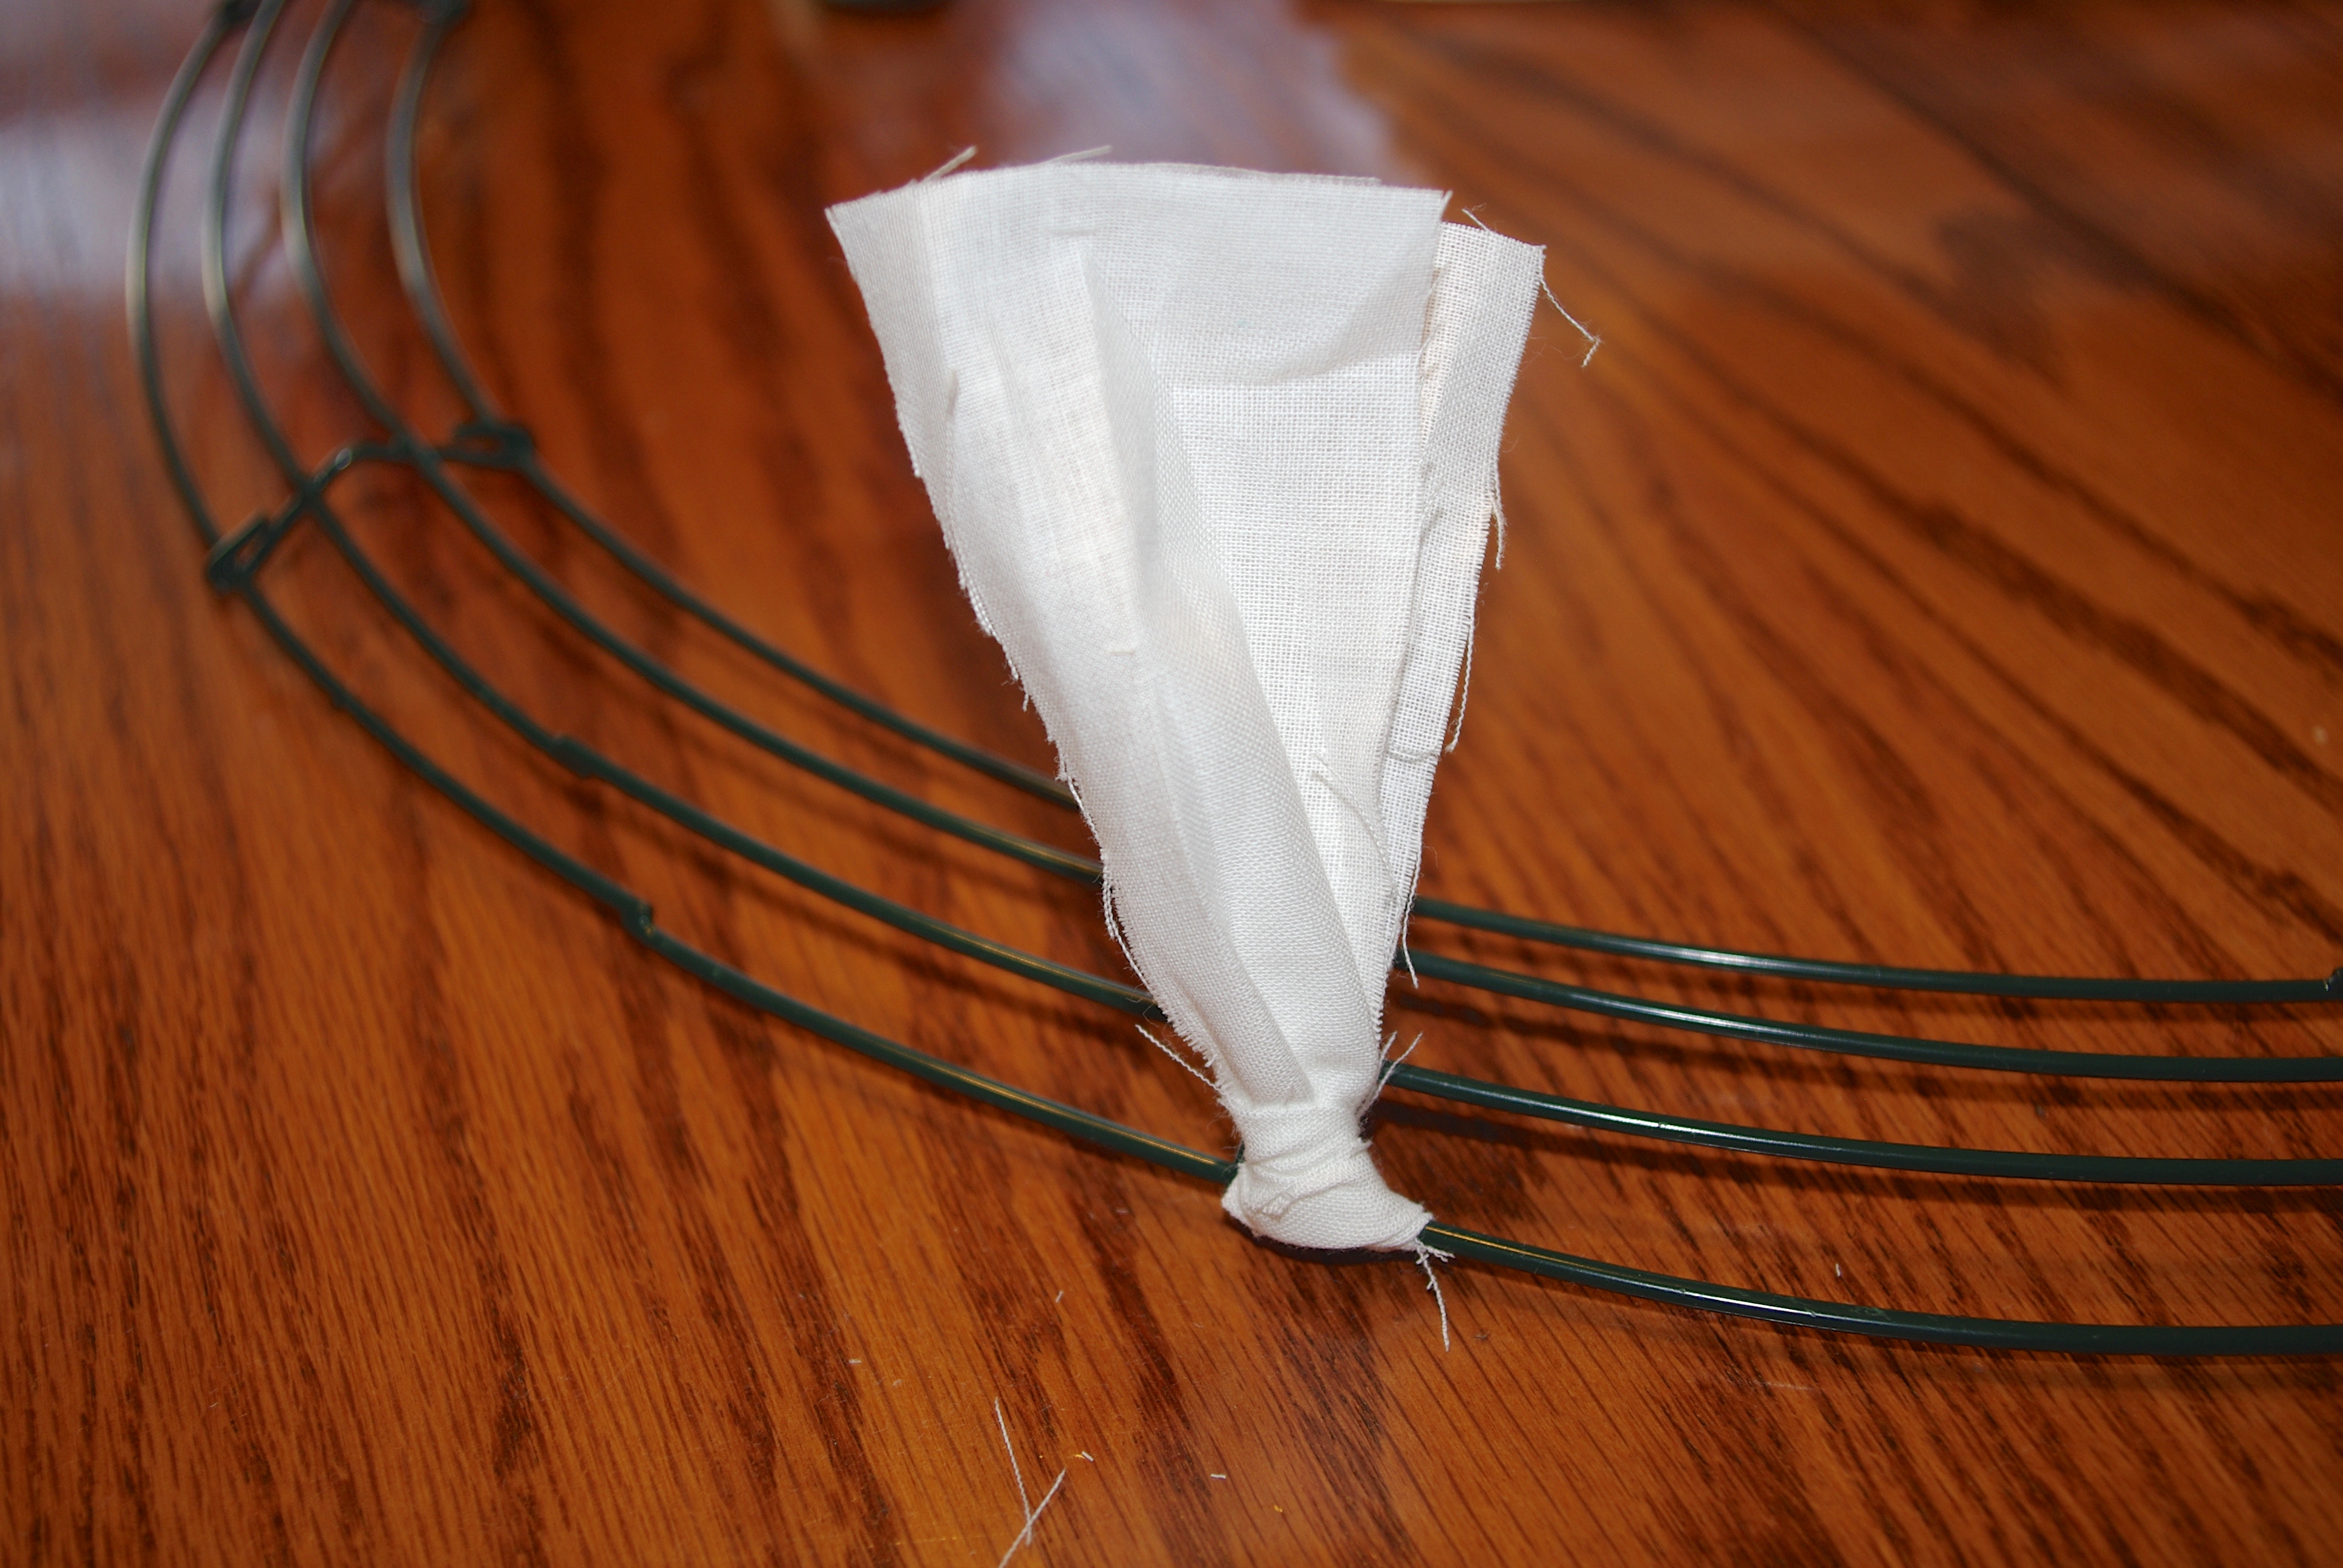
Step 1: Cut fabric into roughly 1.5″ X 9″ strips. Measurements do not need to be exact. You can make your strips smaller or larger depending on your taste.
Step 2: Take one piece of fabric and fold in half placing under the wire.
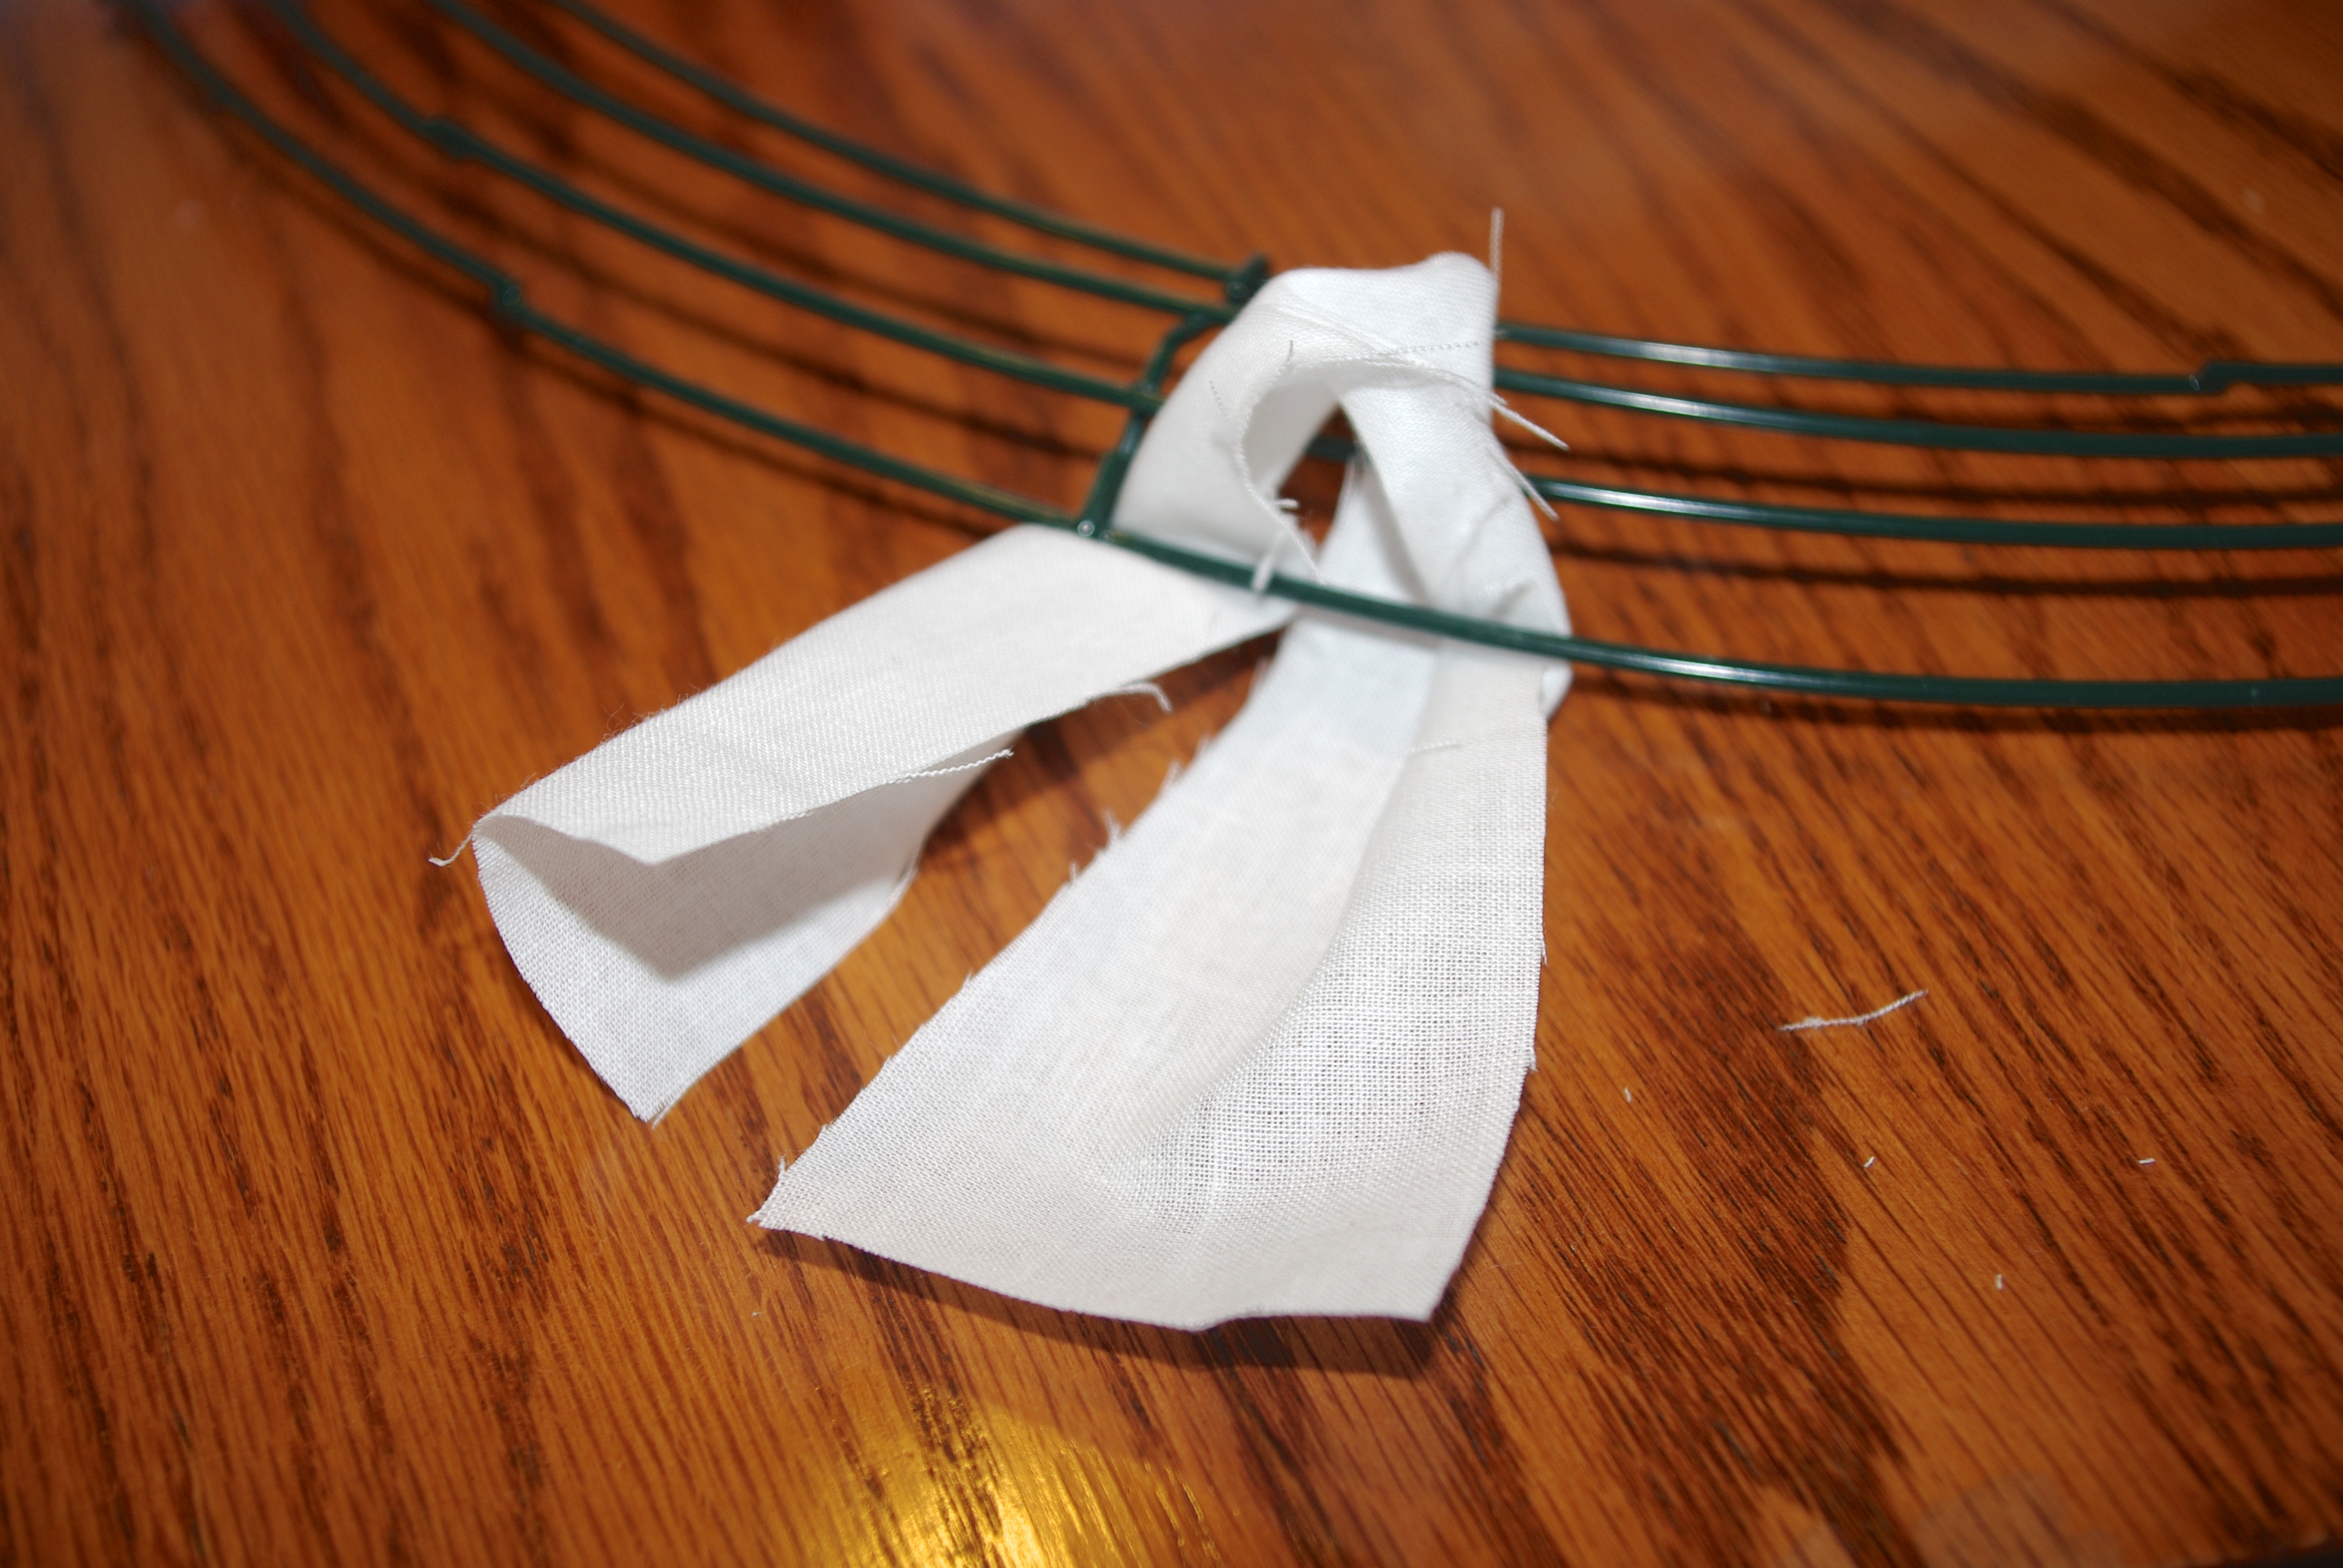
Step 3: Pull ends through loop and tighten to create a knot.
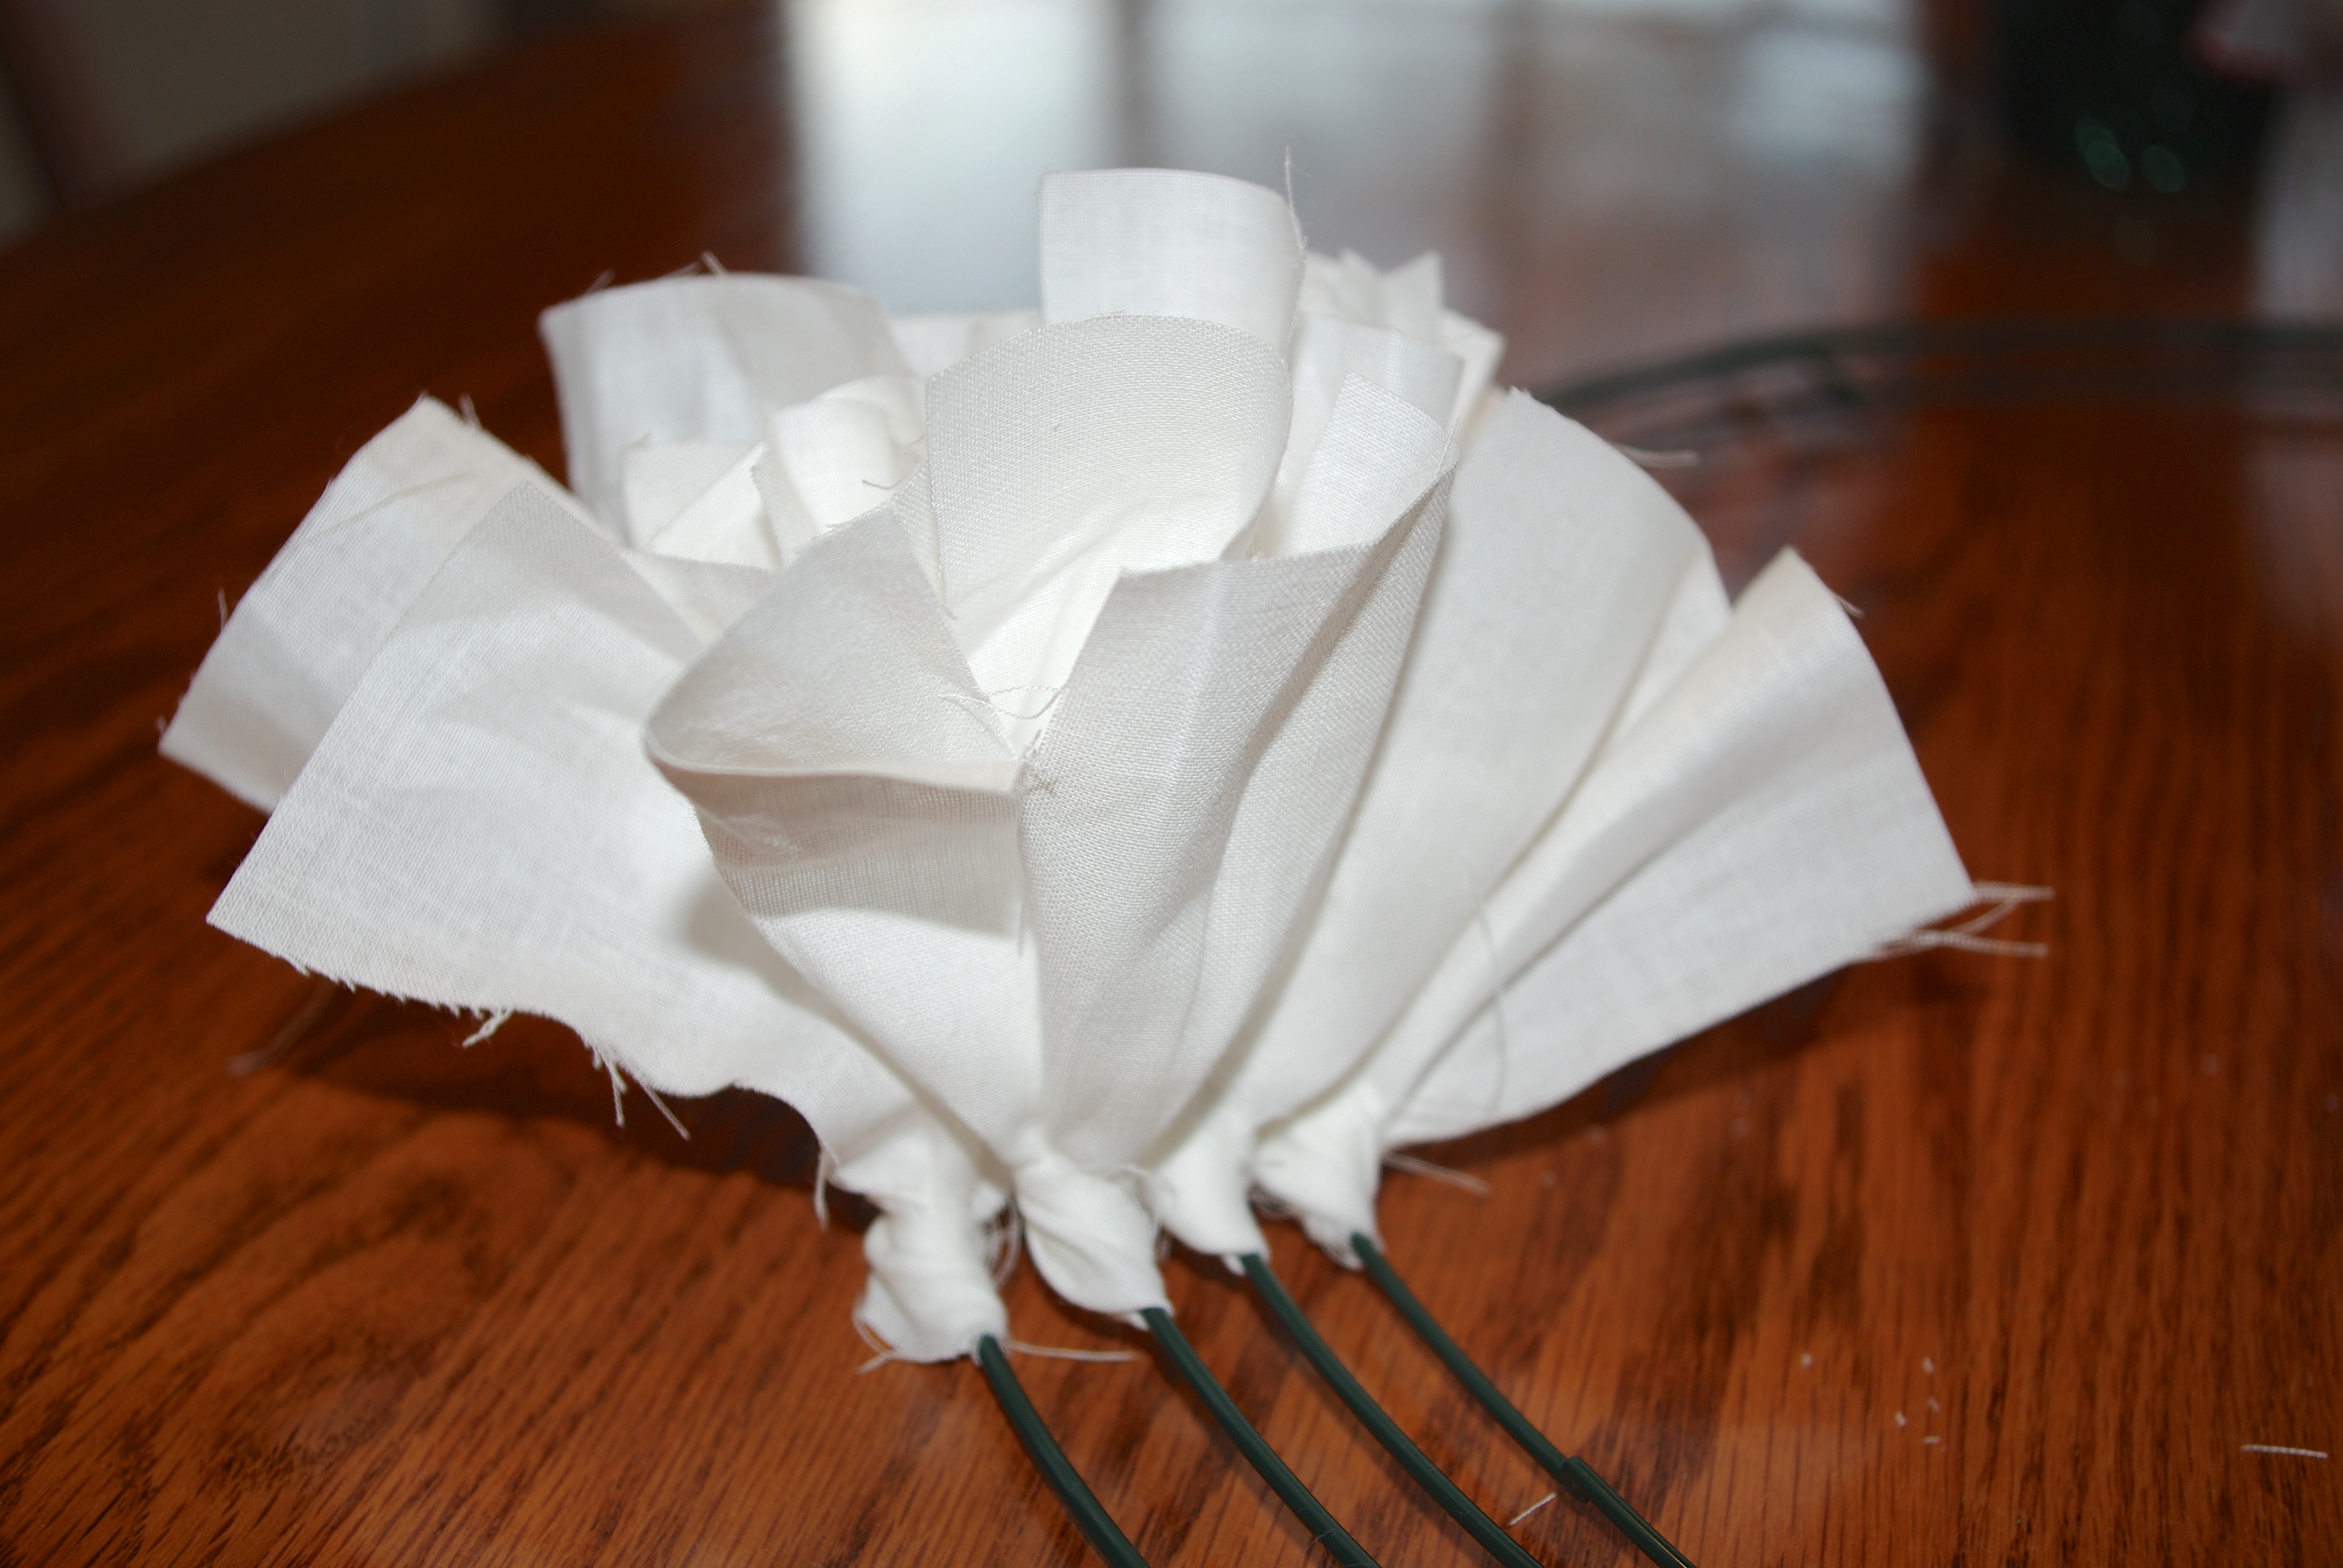
Step 4: Repeat steps 2 & 3 until wreath is full.


Do you think this would work with red burlap?
You could try it, but burlap ravels really easily so it would probably be really messy.
I made it with red burlap. Turned out beautiful, but it was MESSY!! I’m making 3 more for family members without burlap though!
Being retired now, I hope I can mk some extra money. THANKS
Many moons ago, we made these wreaths out of heave plastic white, clear, or green trash bags cut. These could be used outside. I like the material idea though.
Even before that we used tissues in the 50’s lol
Hi, I’ve been making a Christmas themed one, which I cannot do for long periods as I have issues with dexterity, but hey, I have read your tutorial and I never thought to tying the strips on the way you have, it will make all the difference to me. This is fantastic, love your wreath, by the way, it’s lovely. xxx
What a lovely clean design. Thank you for the inspiration. All I need to do is source the wreath wires!
You should be able to find them at Hobby Lobby or Michael’s.
You could tie a strip across the middle and put a red nose and a few white strips for a mustache and also have a short strip across the top to make bangs and add a Santa hat and you would have a santa wreath
love this wreath, can you add emellishment s on it and hat kind.
Thanks for the great tutorial! I’ve been wanting to learn how to make these and had no idea that it was so straightforward! I have lots of ideas for some great wreaths!
Your wreath is beautiful. This is the best tutorial I have seen. I have made rag wreaths before but I knotted the pieces. The way you have done it makes it look much neater. I am certainly going to have a go.
Hi! Where do you get the wire frame for the wreath? I love it and can’t wait to try it out?
Any craft store will have it. I got mine from Hobby Lobby.
You can also get 14.5” wire wreath forms at Dollat Tree. I use them all the time and they are a great value.
Thanks! That will save money!
You made this look easy. Am going to start on a wreath for fall.
I think it’s important to mention that the fabric should be cut on the bias to prevent fraying. If you don’t mind the frayed look, then just cut across fabric.
Hi,
What size was the wreath frame you used in the video please.
thanks—- for showing me that— i have my fabric an wire, so i am readdy to go!! I been making wreaths for many years, I have given many for gifts an sold some at fairs— looking forward to trying this— thanks again sue
I have made 3 wreaths. Can’t wait to try this.
I did make a rag wreath many years ago. Our Sunday school “adopted” a wing at a nursing home. A friend of mine decided that we needed to make a wreath for each room. She bought fabric, straw wreaths. She set the date and told everyone to bring a covered dish and a Philips head screw driver. We prayed for the recipients, our food and fellowship. We ate and were divided into fabric cutters and fabric appliers. I had a great time twisting the fabric on the end of the screwdriver and shoved it int the wreath! I have no idea how long to cut the fabric. I’m hoping it will come to me like the great memory just did! Sorry! I didn’t mean to write a novel to a simple question!
I got my supplies! Going to make a 20 ” whit wreath. Thank you for your video.
Beautiful. Do you use a double knot or is that necessary?
Yes.
How do you control the fraying? Would it help to spray with starch or adhesive? My wreath is finished but I still keep pulling strings.
I guess it depends on the fabric, but I have not had problems with fraying, of course most fabrics will fray some and I think that is part of the appeal of the shabby chic look.
How do you cut layers of material? I have roto cutter and scissors.
Watching the video will probably help.
I gonna make several for Christmas gift, thanks.
Thank u ,
Love them
Love this! Great simple and to the point instructions! Definitely going to make one(or more) as holiday gifts! Thank you!
Love this idea
I have made a couple of these. I used shorter pieces of material and they came out good!
Just learning. Thanks for simple explanation. Can’t wait to see more what you do. Always looking for ideas.
Thank you
How do I know I’m buying the right fabric?
Can a top sheet be used?
Rag wreath instructions